Follow the step-by-step process given below to create a Twitter using your Android phone today.
How to Create a Twitter Account
Step 1 & 2: Download the Twitter App
In the Google Play Store, search for the Twitter app. Download the Twitter app by click on ‘Install.’
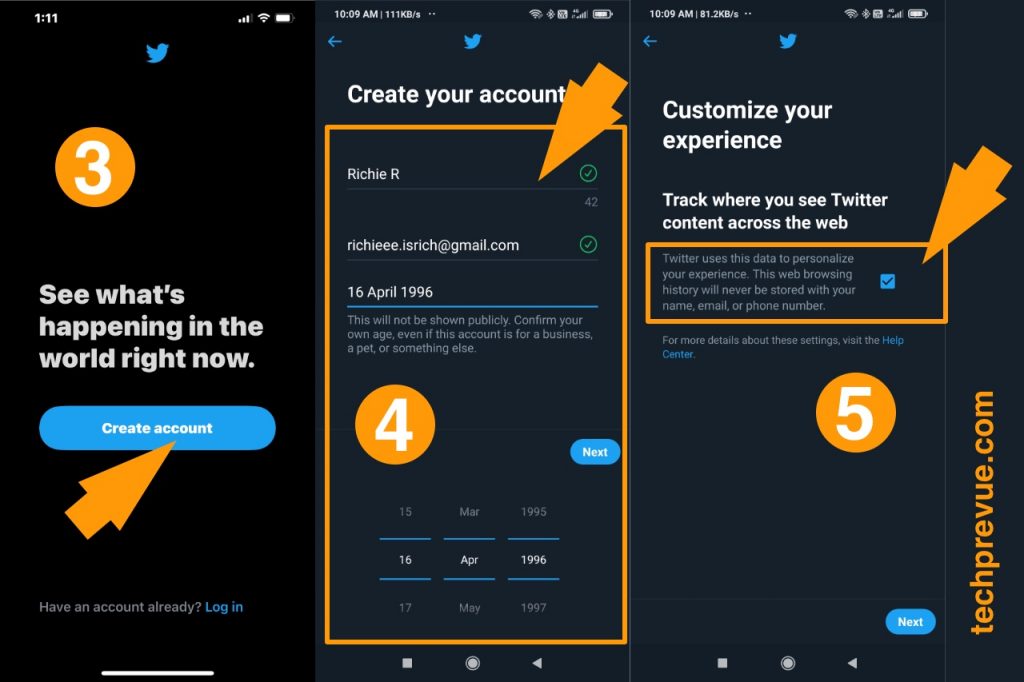
Step 3: Install the Twitter App
After installation is finished, open the app. Click on the Create account button to Sign up.
Step 4: Create Your Account
Enter your full name and phone number. You can click on the ‘use email instead’ option if you don’t want to use your mobile number. Enter your Date of Birth and click Next.
Step 5: Customize Your Experience
A new page will open ‘Customize your experience.’ Here, you can disable this setting by unticking on the check box according to your preference. Click on the Next.
Step 6: Verify Account Details
On the next page, verify your account details and click on Sign Up.
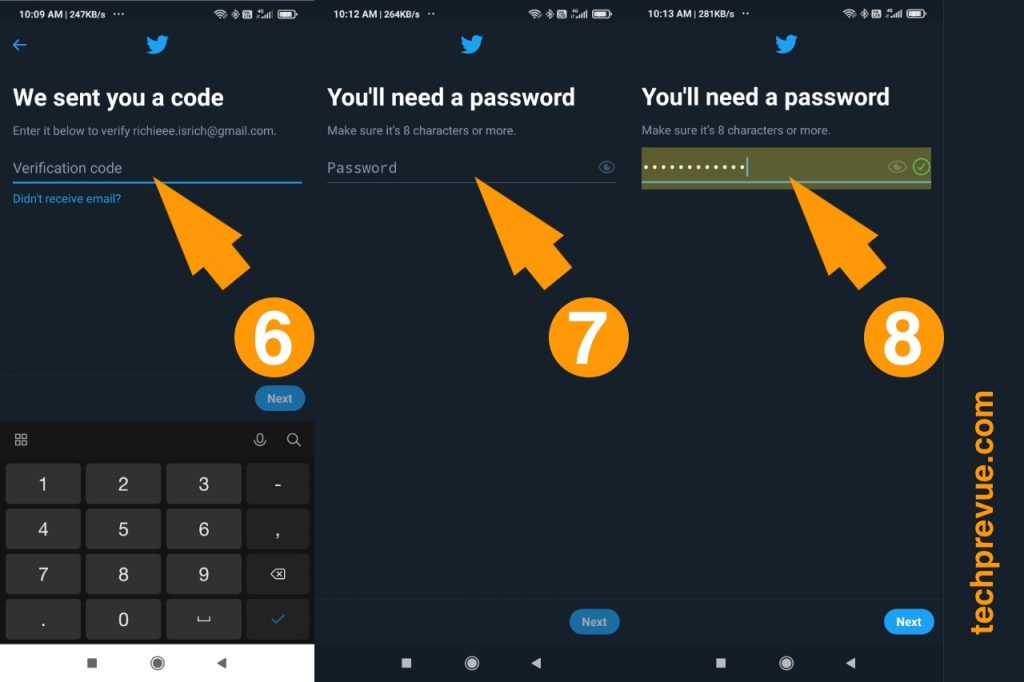
Step 7: Account Verification
You will be asked to enter a verification code or OTP (One-time password) sent on your email or phone number to authenticate your account on the new page. Enter the code and click next. In case you didn’t receive the verification code, click on the ‘didn’t receive code’ text to resend the code to your email address or phone number.
Step 8: Choose A Strong Password
On the next page, enter an eight or more digits strong password for your Twitter account. Click next to finish signing up for Twitter account.
On the new page, you will find options to set up your Twitter account. You can opt to skip these steps, but it’s better to complete them now. If you have accidentally skipped a few steps or closed the Twitter app, you can still complete the set process for your account. We have added the steps later in the article.
How to Set up a Twitter Account
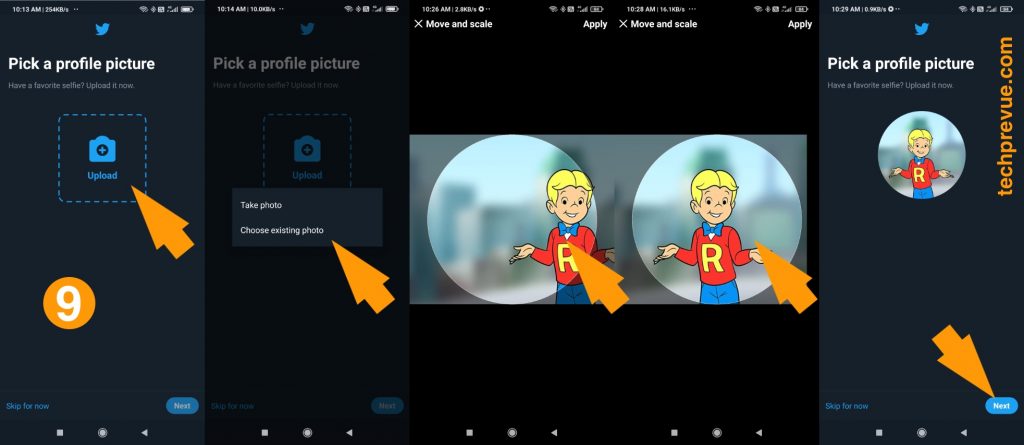
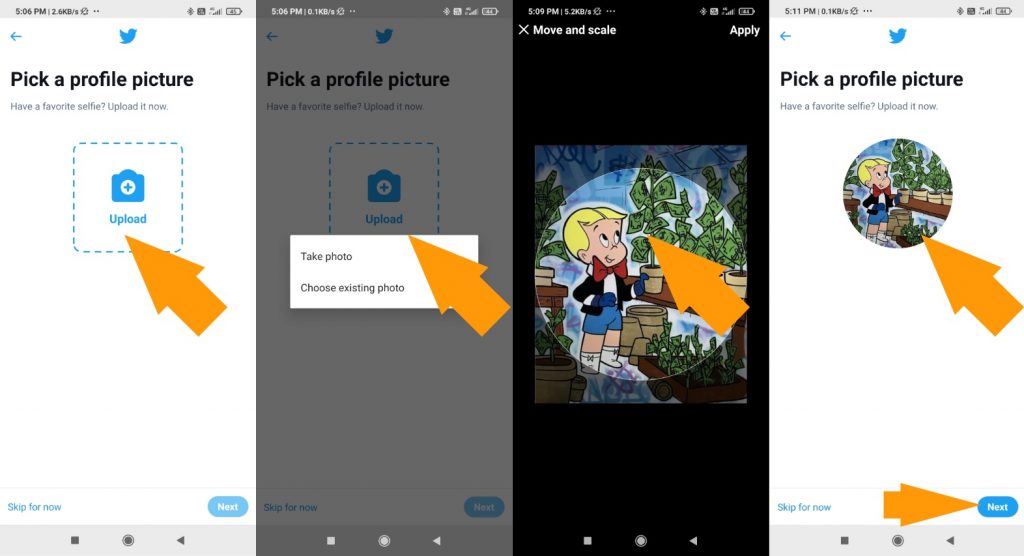
Step 9: Pick a Profile picture
Tap on the plus button of the camera to upload your profile picture. You can select either the ‘Take photo’ option (to click a picture and upload it) or the ‘Choose existing photo’ option (to pick an already saved image from your phone gallery). Move the photo and adjust your uploaded image on the circle and click on Apply to see the preview. Tap on the Next to move further.
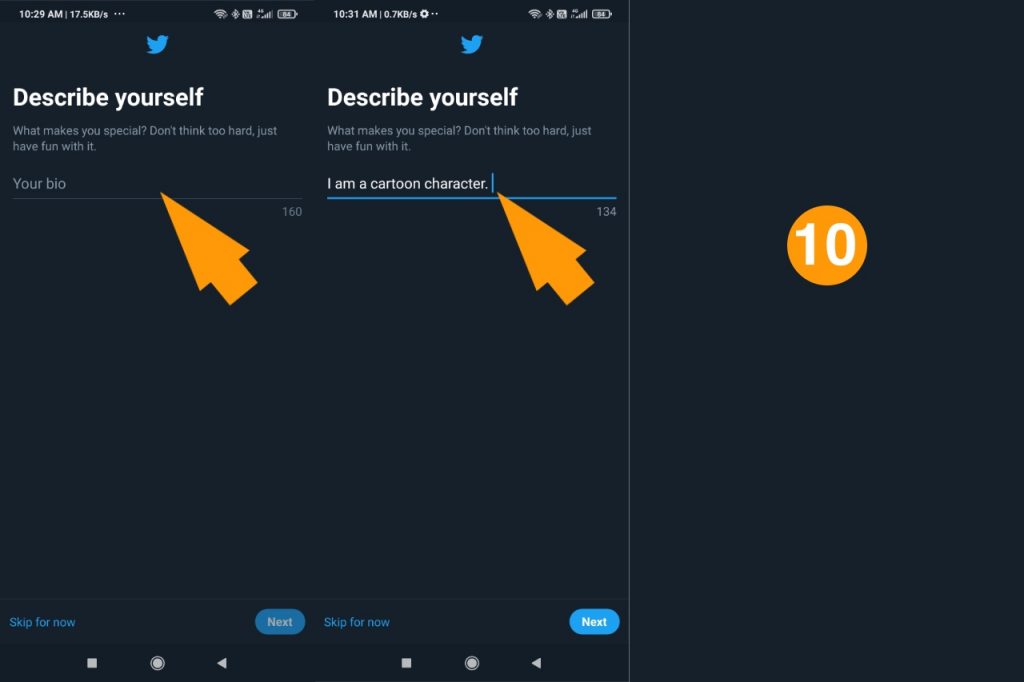
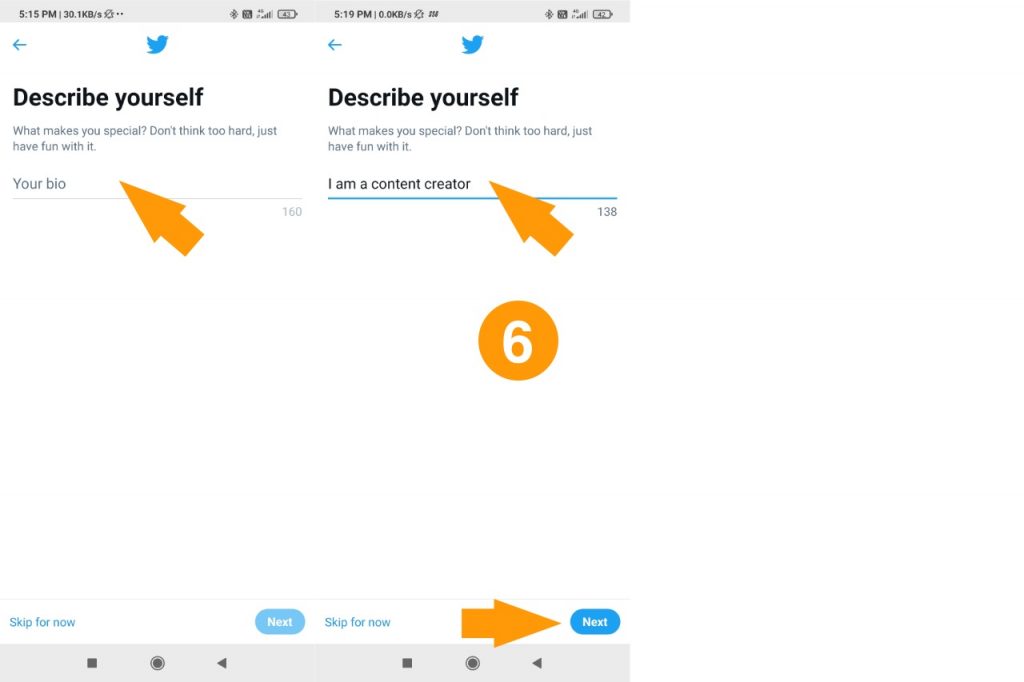
Step 10: Describe Yourself
You can enter a short bio about yourself or your brand and company in 160 characters on the new screen. Tap Next when done or Skip if you don’t want to enter the details now.
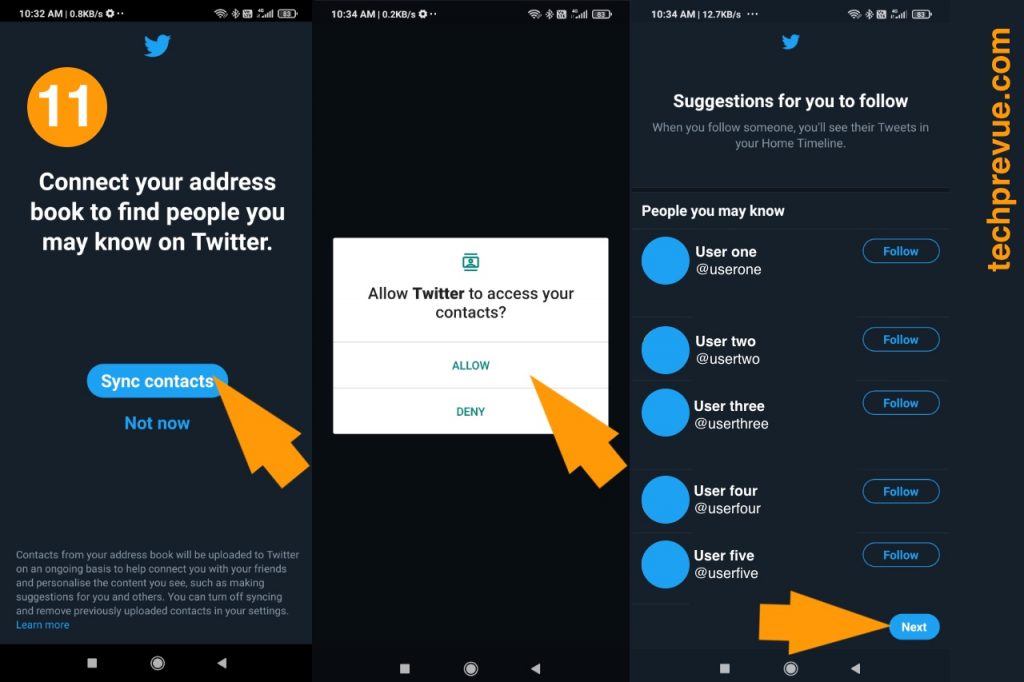
Step 11: Sync Your Contacts
You can opt to sync your contacts to find your friends and family in the suggestion box on the new page. Follow the ones you know and click on the Next to move forward.
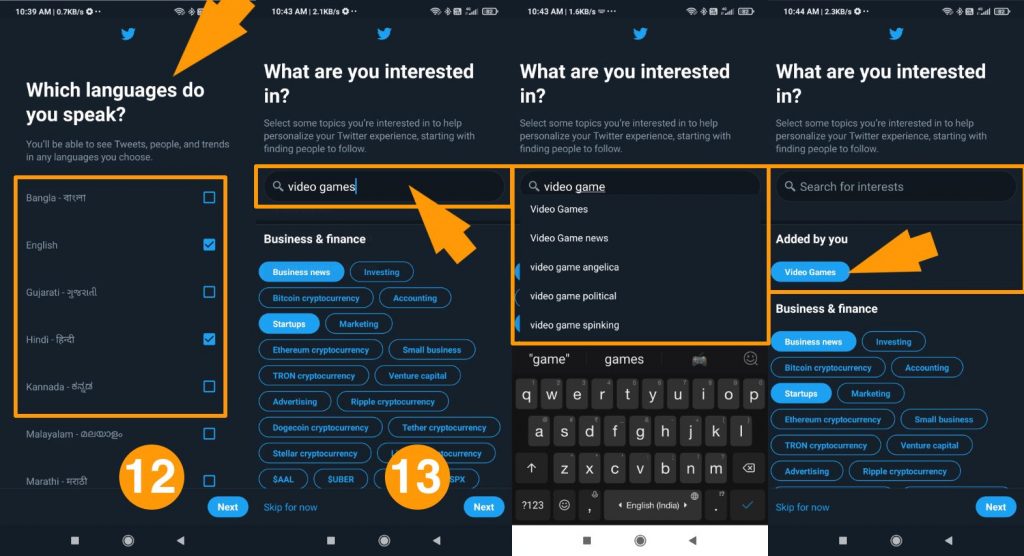
Step 12: Choose Languages
On the new page, select one or more languages you recognize or want to see posts in that language by tapping on the check box. You can choose multiple languages at a time. Tap on Next when done.
Step 13: Select A Few Interests
Here, you can select topics that interest you from different sections to personalize your Twitter experience. If you can’t find what interests you, you can search for it and add it to your interest. Tap the Next button to move ahead.
Step 14: Select A Few Followers
On the next page, you will get the suggestions to follow Twitter accounts based on your interests and location. Tap ‘follow’ to follow these accounts or profiles. Click on ‘Follow (no of pages you are following)’ to move forward. Once done, you will enter your home page. But there are still some details missing in your Twitter profile. Follow these steps to complete your Twitter profile –
How to Complete Your Twitter Profile
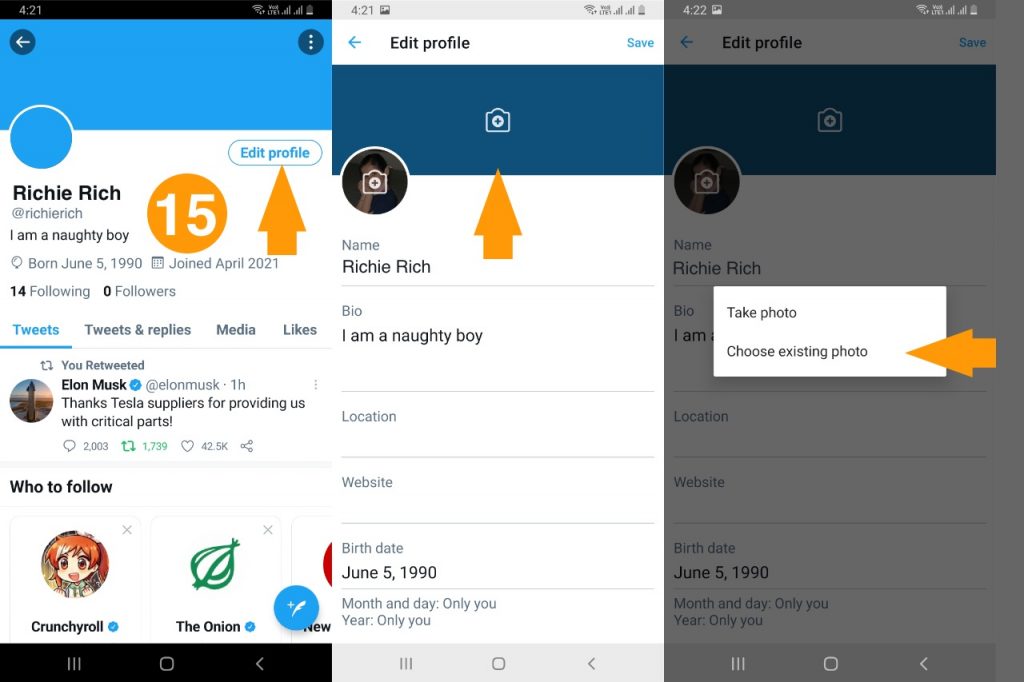
On the Home Page, tap on the three bars visible on the top left corner and select the Profile option. Tap on the edit profile option on the new page.
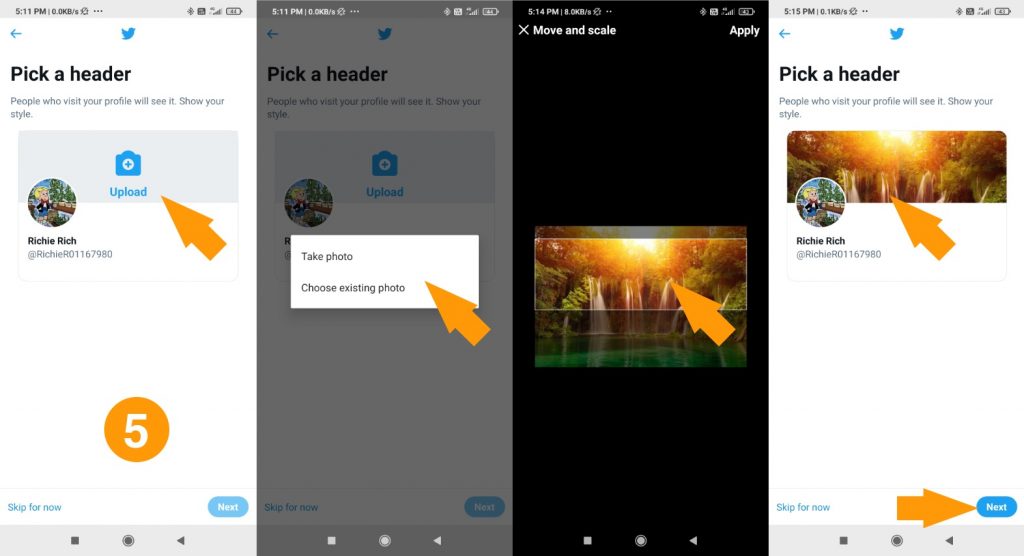
Step 15: Pick a Header Image
This is the background picture of your profile (visible behind your profile photo). Click on the plus (+) button to upload your header picture. You can select either the ‘Take photo’ option (click a picture and upload it) or the ‘Choose existing photo’ option (to pick an already saved image from your phone gallery).
Step 16: Enter Your Location
Add your current location to get updates that are most relevant to your country or state.
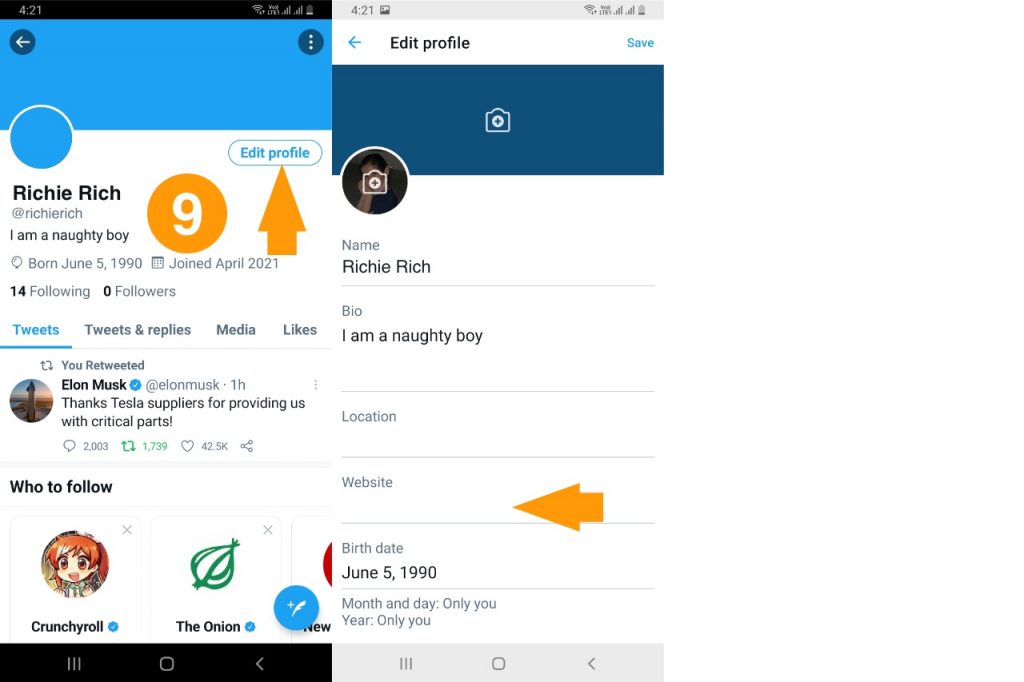
Step 17: Enter Your Website
Add your personal or company website URL for your followers to get more information about you. After all the details are complete, click on Save to update your Twitter profile. Note – After setting up your Twitter account, you can click on the Edit Profile button to change other details on your Twitter account. It includes changing your name, bio and adding details like location or website. Plus, you can also change your DOB. But you can edit DOB only a few times, so make sure not to make too many errors.
How to Set Up A Twitter Account If Skipped Some Steps
Follow the step-by-step process to learn how to setup a Twitter account.
Step 1: Log in to Twitter Account
Log in to your Twitter account to enter the home page. (if you are logged out)
Step 2 & 3: Set Up Your Profile
Here, tap on the three bars visible on the top left corner and select the Profile option. Tap on the Set up profile option on the new page.
Step 4: Pick A Profile Picture
Tap on the + button to upload an image for your Twitter account. You can move or zoom in/out the image as per your preference. Once done, click on apply to see the preview of the edited photo. Finally, click on Next to save the image.
Step 5: Pick A Header Image
Click on the plus button, repeat the steps (given for adding profile photo), and save your header image. Click the Next button.
Step 6: Describe Yourself
Here, add a little detail about your brand, company, or yourself in 160 words. You can also add your website link in your bio. Click the Next button after adding your bio.
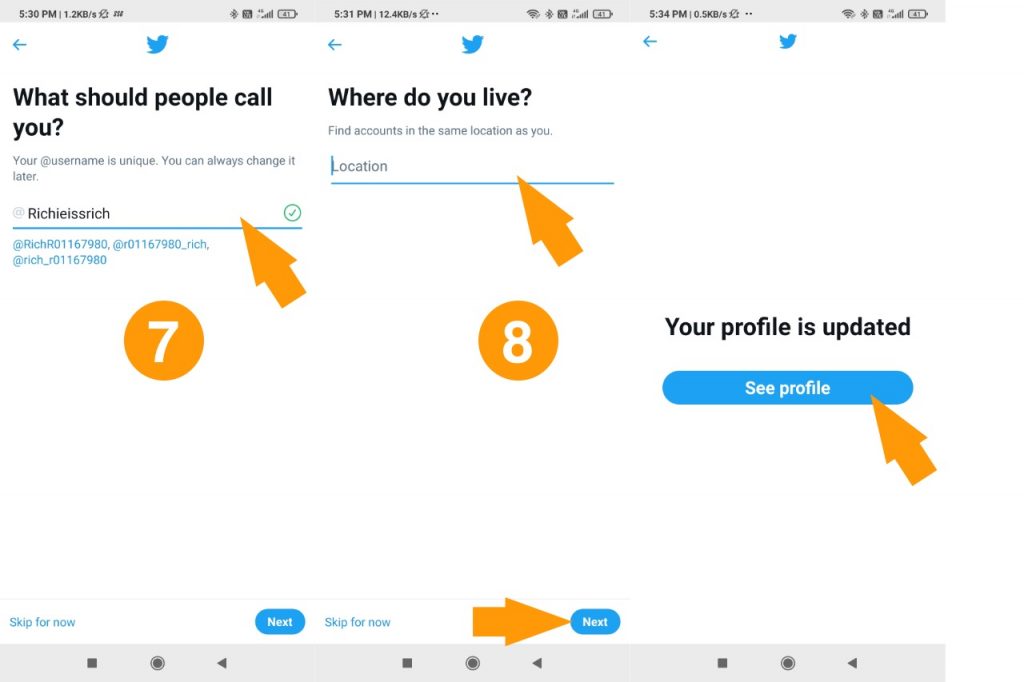
Step 7: Add Username
Add a username to your profile. You can also pick the suggested name by tapping on ‘show more.’ Click the Next button when done.
Step 8: Add Location
Here, you can add your current location to get updates relevant to your country or state. Click the Next button when done.
After adding the final details, click on ‘See Profile’ to check how your Twitter account looks.
Step 9: Update Your Website
You are on the profile page. Click on the Edit profile button. Enter your website.
Tap the Save button to save your Twitter profile details.
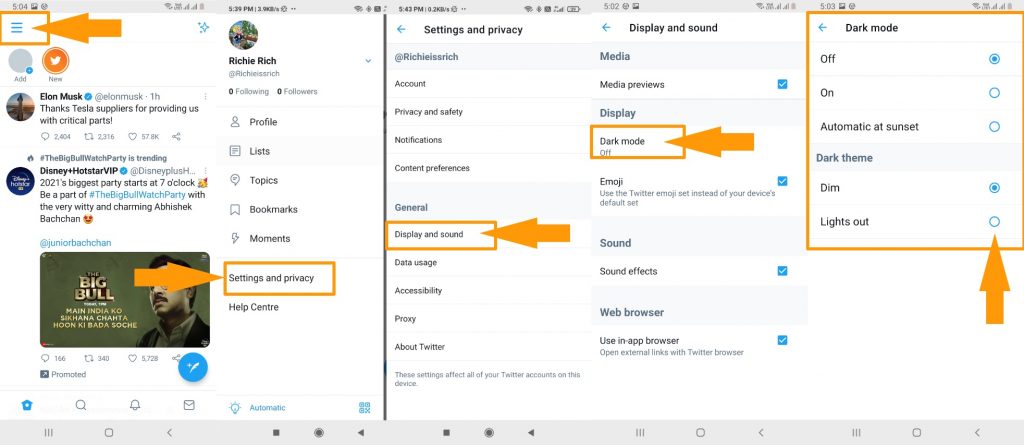
How to Change Twitter Display of Your Account
Step 1: Open your Twitter home page. Step 2: Tap on the three bars on the left corner of your screen. Select the Settings and Privacy option. Step 3: Look for the General Settings. Tap on the ‘Display and Sound’ option. There you get the option to turn on or off the Dark Mode. You can also choose between the two Dark themes Dim and Lights, out.
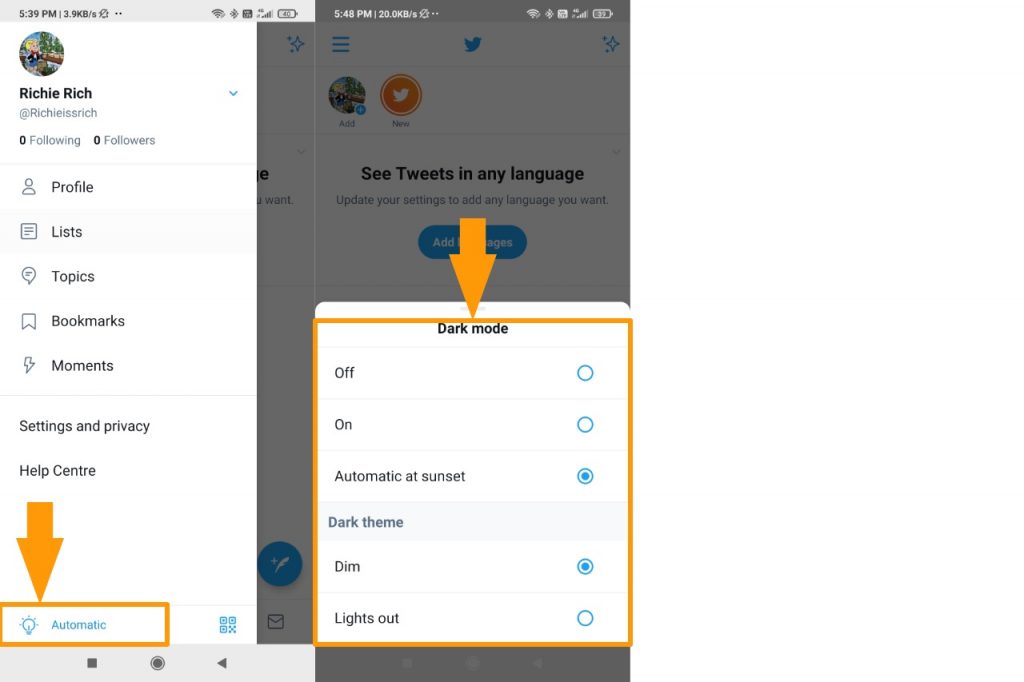
Alternatively, you can tap on the Automatic option (with a bulb) on the bottom to enter the same.
You can review all the changes in the background that you made in the display settings. Tap the back button, and it will automatically save the display. In our previous article, we have discussed how you can also sign up for Twitter from your desktop computer or laptop. You may read that article. Editor: Vinay Prajapati