We are going to cover essential information that you need to know about the TPM module. Of course, we will show you how to enable TPM 2.0 in the BIOS and use the latest Windows operating system.
What is TPM 2.0?
TPM is a short version of “Trusted Platform Module” and there are 1.2 and 2.0 versions of it. However, Microsoft skipped the 1.2 version and moved on to the 2.0 version due to unknown reasons. TPM is an advanced technology that will perform secure boot, secure encryption, and prevent malicious attacks during the boot sequence. Windows 11 is depending on the TPM technology to create a secure environment for the machine owners. Face recognition and fingerprint unlock utilize the TPM technology as well.
Laptops and desktops launched in the last six years period may have TPM 2.0 integrated into the machine.Desktop owners can purchase TPM modules starting from $24.99 – $100 depending on your motherboard model and manufacturer.The removable module is not designed for laptops, so that’s a limitation of portability.
However, the desktop owners aren’t lucky either because there is a TPM module shortage in the market after the Windows 11 announcement. Speaking of Windows 11, Microsoft availed developers edition for the public beta users. We have authored a detailed tutorial on how to install Windows 11 on AMD and Intel PC. The increase in demand has encouraged business owners to purchase the modules in bulk and sell them for much higher prices. We implore the readers to try looking for the TPM technology in your motherboard. Our B450 motherboard launched in 2017, and it has a TPM 2.0 chip inside. We are going to show you how you can find out whether the TPM 2.0 module is present on the board or not.
How to check TPM 2.0 Compatibility?
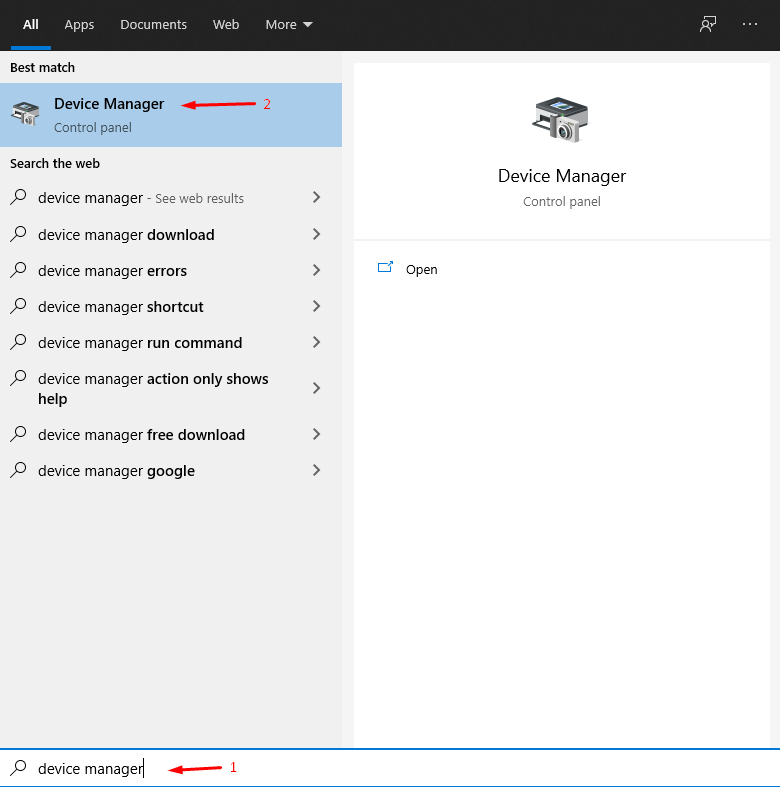
You can check TPM compatibility in Windows 10, and that’s how I was able to find out whether the motherboard supports it or not. Step 1: Press the Start key, search for “Device Manager,” and then open it.
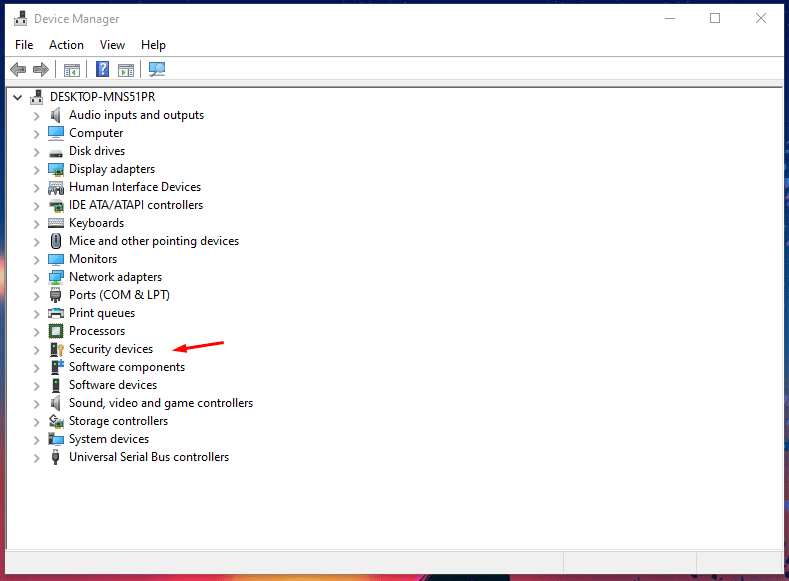
Step 2: Click on “Security devices” to view the hidden devices.
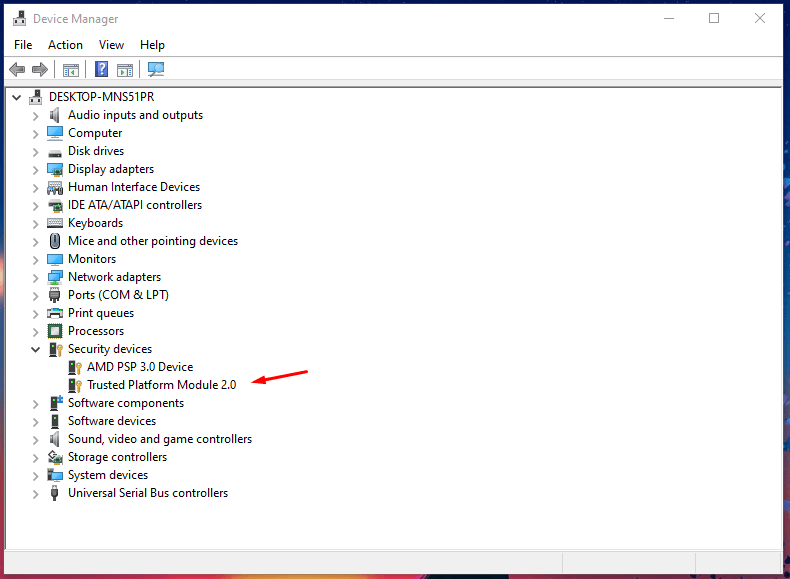
Step 3: There you go; TPM 2.0 is present in it.
Your motherboard has a TPM module installed in it, and that’s good news. However, you have to keep in mind that it won’t show up in the Device Manager if it is not enabled in the BIOS. Every board is different since it depends on the manufacturer on how they have tweaked it.
How to check TPM 2.0 Compatibility via CMD?
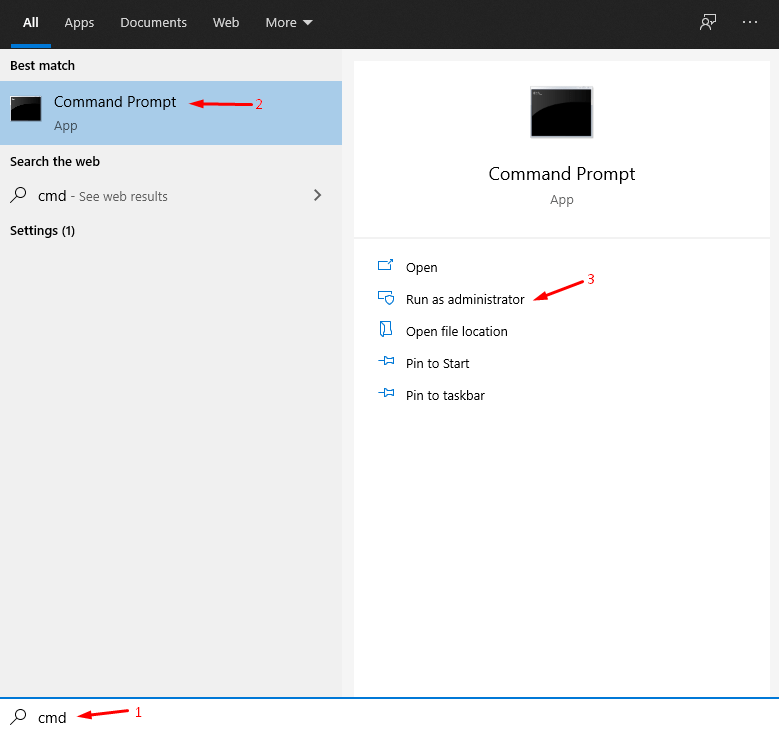
Command Prompt is the ultimate powerhouse in Windows machines, and we are going to make good use of it. Step 1: Press the Start key and open CMD as administrator.
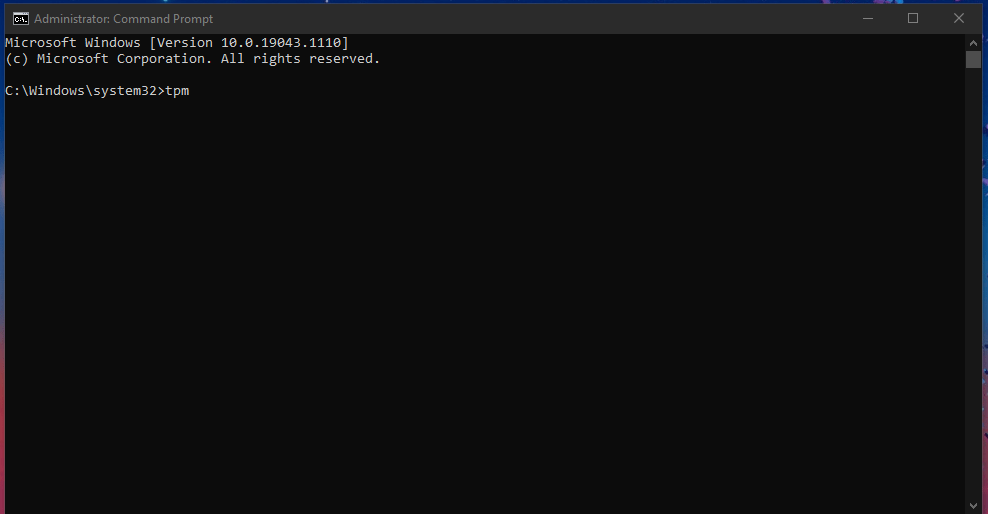
Step 2: Press “tpm” and then hit the enter key.
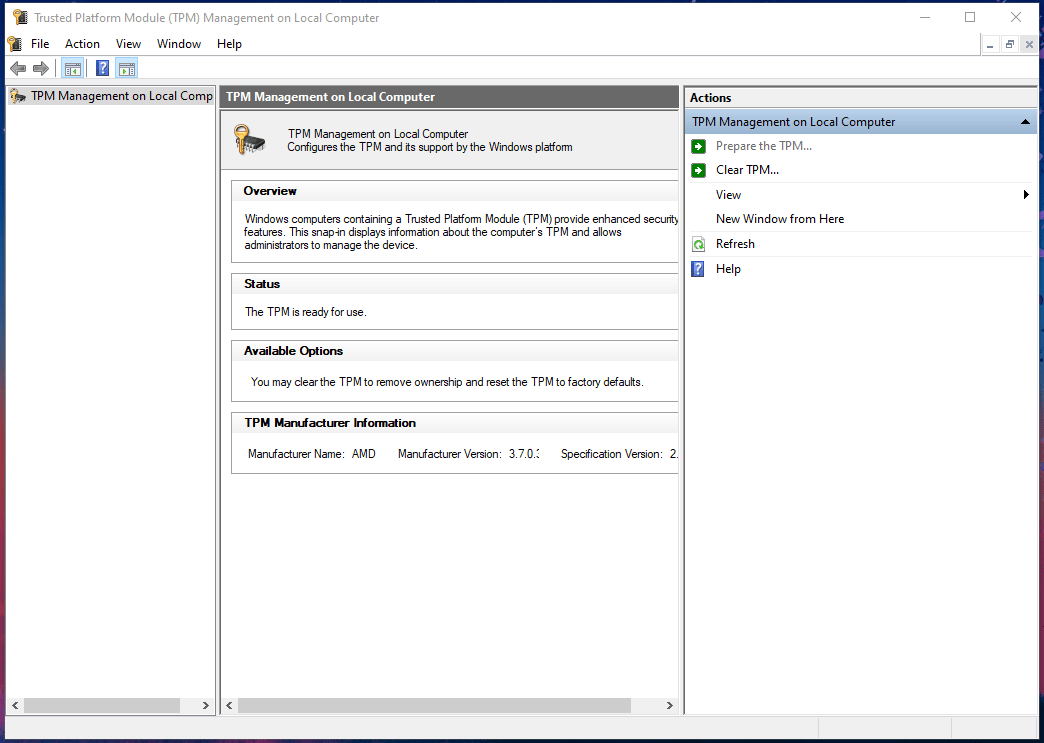
Step 3: A new window shows up on the screen, and it will mention under the status “The TPM is ready to use.”
In many cases, you will have a “Compatible TPM cannot be found” error on the screen. Many motherboards don’t let the software detect it until or unless you enable it manually in the BIOS.
How to Enter motherboard BIOS?
Accessing BIOS is a next-level process, where the majority of the users never involved themselves in this position. I don’t recommend the newbies play around in the BIOS because it can mess up the configuration. I always record what I’m doing in BIOS to look up whether I have accidentally changed a specific setting. You can keep track of every action by capturing the process, which is not a difficult task with a smartphone. You can use OBS Studio to record the actions, and we have authored a detailed tutorial on it. BIOS Key: DEL, F12, F11, F1, and F2. The delete key in the keyboard works as the BIOS entry key. Step 1: Shut down your Windows machine. Step 2: Let PC sit there for ten seconds. Step 3: Click on the power button to turn on the PC. Step 4: Press the DEL key until BIOS shows up on the screen.
All navigation instructions are located at the bottom or on the right-side panel. You can press the ESC key or F12 to exit BIOS, but it could be a different key in your board.
How to Enable TPM 2.0 in BIOS?
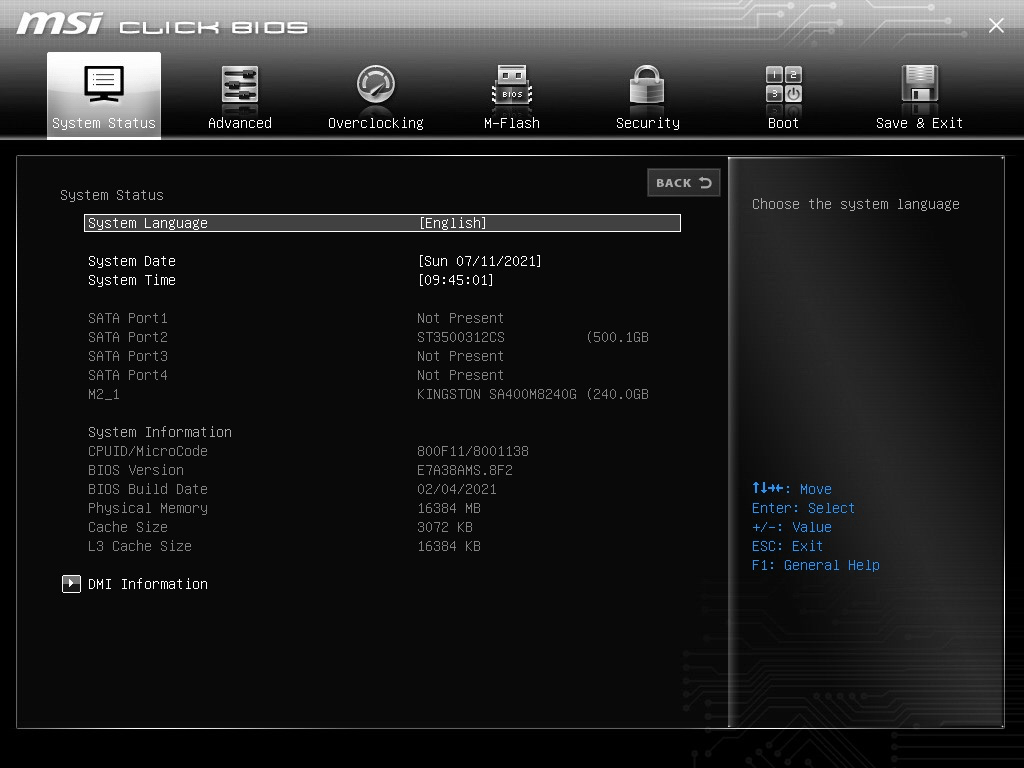
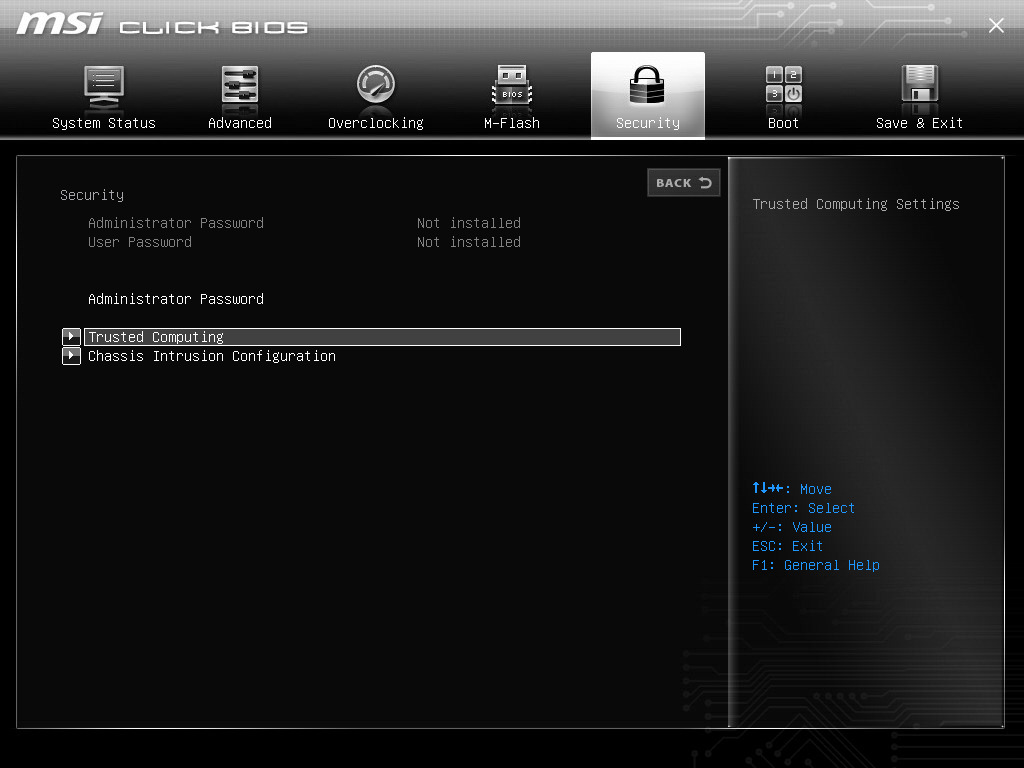
Every motherboard has a different user interface and has a different menu. Let me give you quick information about my motherboard. Motherboard: MSI B450M BIOS: MSI Click BIOS However, I can show you how it’s like to access BIOS and enable TPM. You can contact the manufacturer support team or nearby computer service store for further assistance. I will cover enabling TPM 2.0 in BIOS play-by-play without missing the point. Step 1: Power up the machine and press the DEL button until the BIOS interface shows up on the screen.
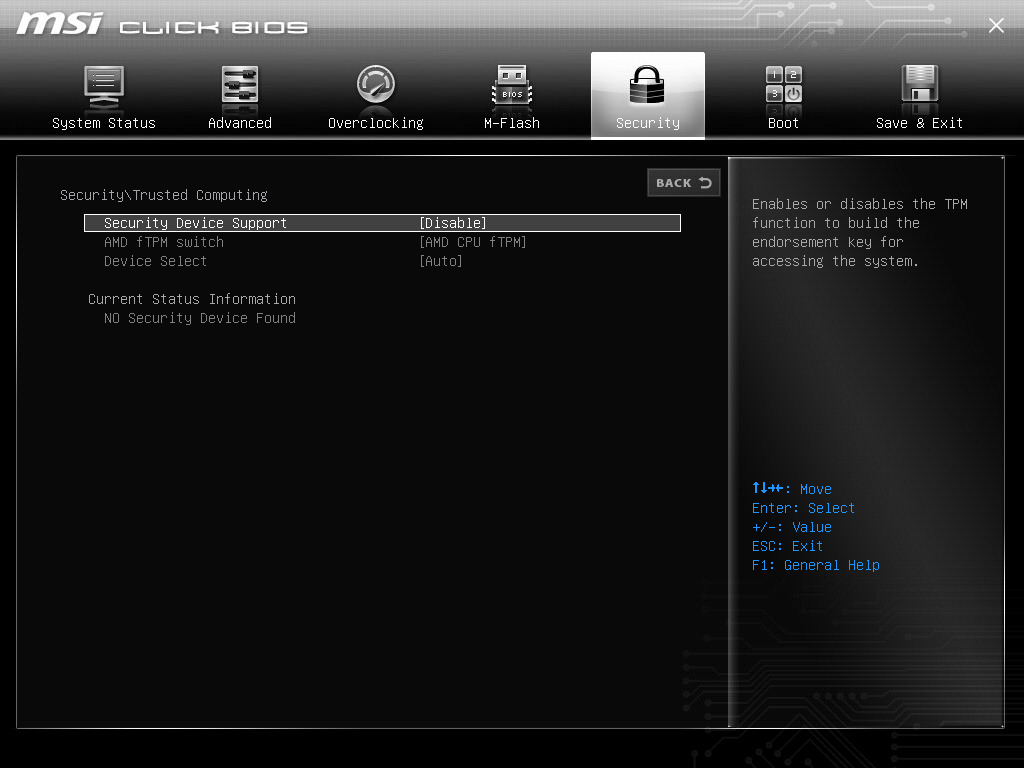
Step 2: Click on “Security” from the main menu. Step 3: Click on “Trusted Computing” to continue.
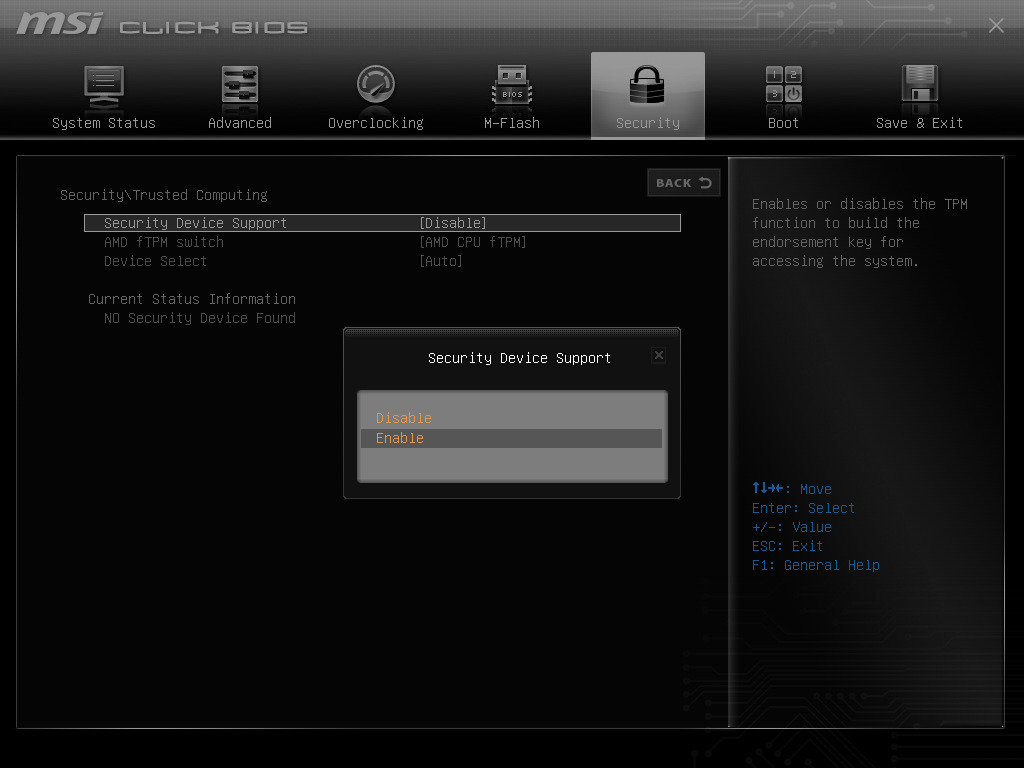
Step 4: Click on “Security Device Support” to continue.
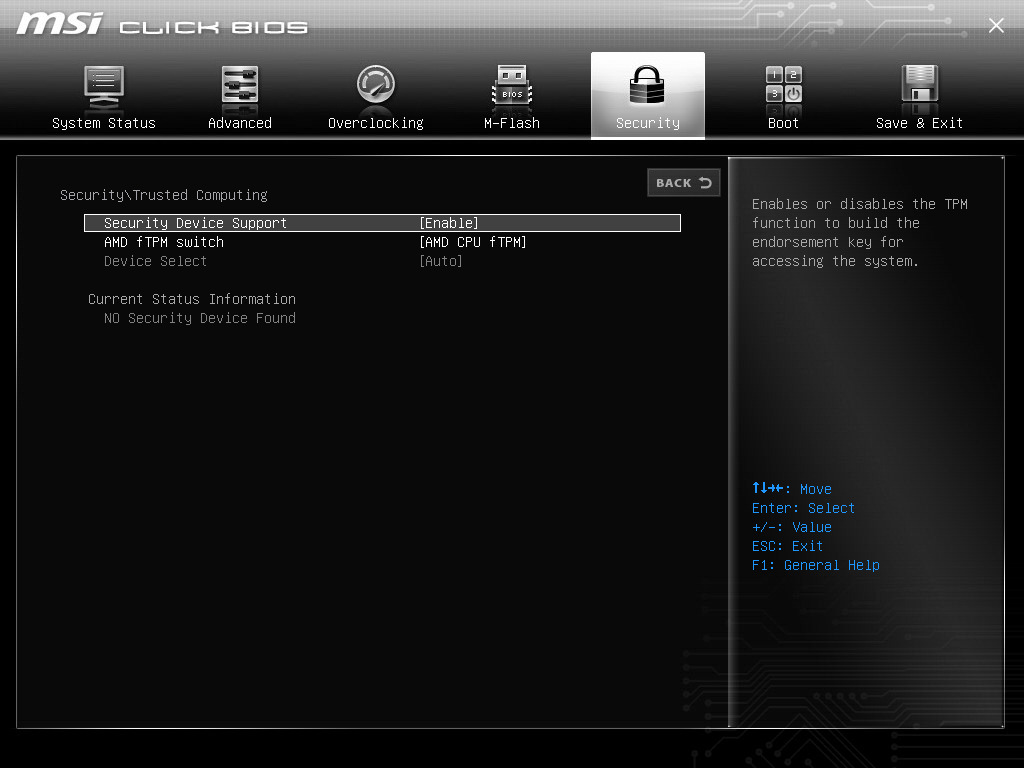
Step 5: Use up/down arrows to choose the “Enable” option.
Step 6: Press enter key to confirm it.
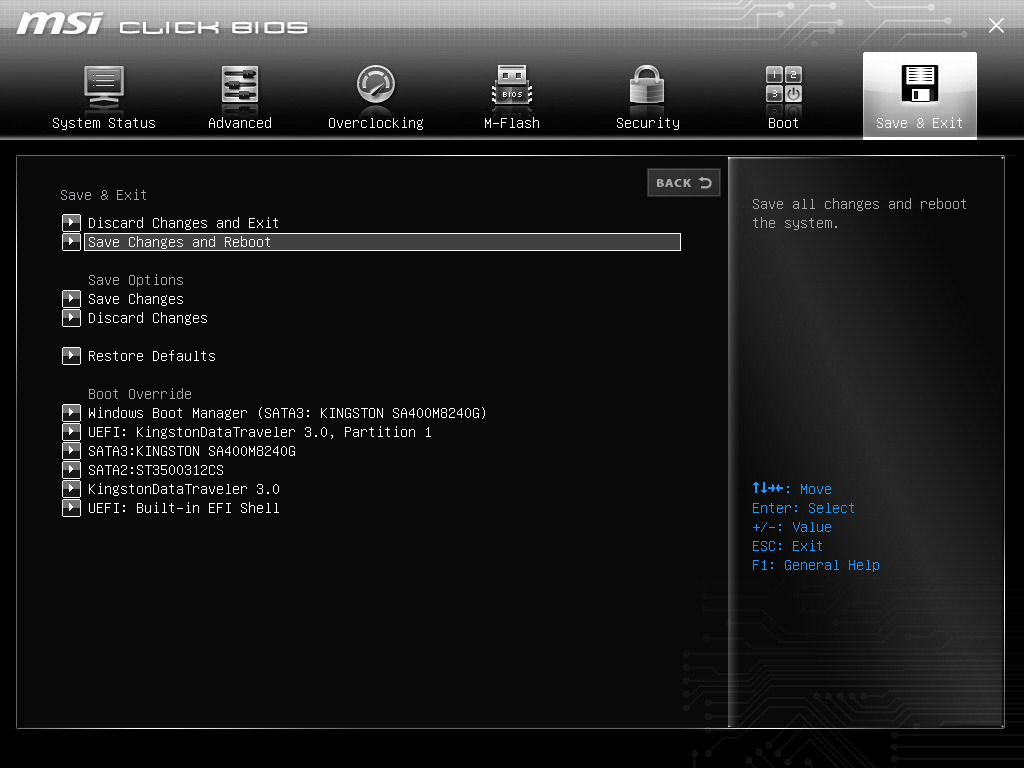
Step 7: Click on the “Save & Exit” option from the main menu.
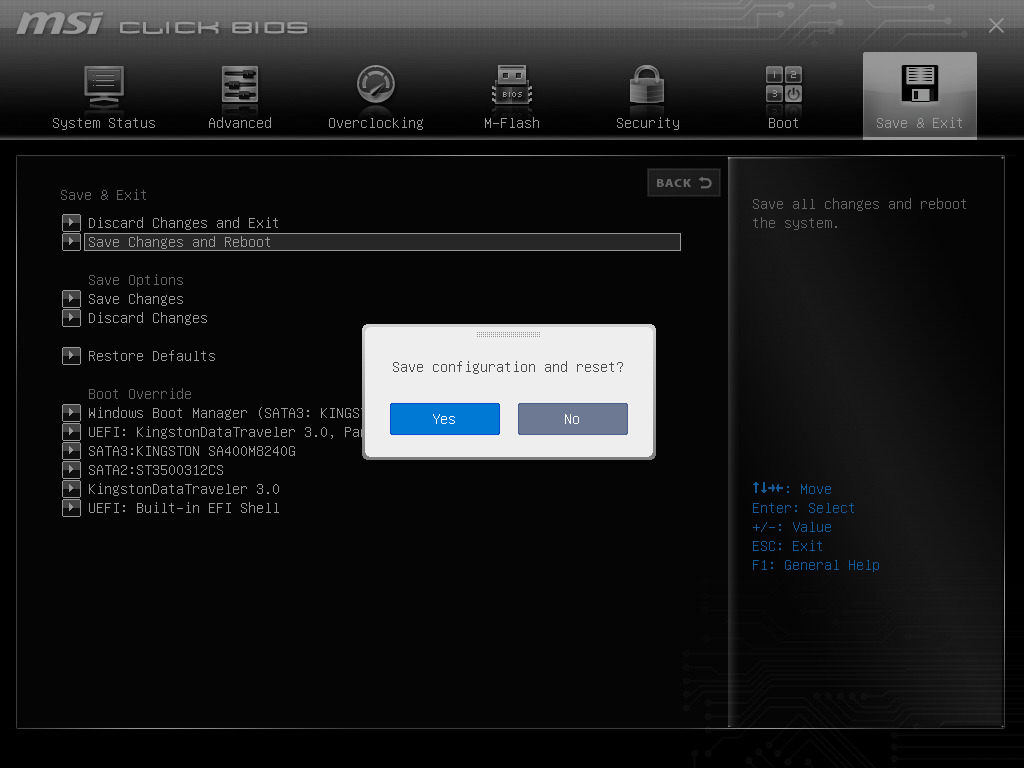
Step 8: Choose “Save Changes and Reboot” and press enter key to confirm it.
Step 9: Click on “Yes” to confirm the action. Your PC will restart, and it will boot back into Windows OS. You can check Device Manager and CMD whether the TPM module is enabled or not. It was interesting to witness TPM having a different name in the BIOS. I’m having an MSI B450M motherboard with Click BIOS GUI. Modern boards manufactured within six years of the period have TPM 2.0 modules integrated with them.
Bottom Line
Here’s how you can enable TPM 2.0 in motherboard BIOS and anyone can do it without messing up the configuration. I ask you to do some research keeping your board model and manufacturer in mind. You can purchase an aftermarket TPM module from a nearby store but make sure it is coming at a reasonable price. Let us know what complications you faced while enabling TPM 2.0 in the comment section below. If you’ve any thoughts on How to Enable TPM 2.0 in Motherboard BIOS?, then feel free to drop in below comment box. Also, please subscribe to our DigitBin YouTube channel for videos tutorials. Cheers!
How to Fix Microsoft Store Stuck Installing Apps on Windows 11? How to Fix Msxml4.dll Not Found or Missing Errors? Password Protect File or Folder Zip on PC | Windows and Mac
Comment * Name * Email *
