Along the same lines, changing the default Windows fonts is something that quite a few users look forward to. Not only from the customization point of view, but having a custom font could also help you while designing a certain project work or just for the sake of switching away from the same old monotonous text styles. Well, there could be a plethora of other reasons why one might need to install a custom font in Windows 11. If you are also planning on doing the same, then this guide is here to help you out. Follow along for the instructions.
Best Ways to Add Custom Fonts in Windows 11
There exist two different methods through which you could carry out the aforementioned task. Both these methods have their own set of perks and caveats. So make sure to go through them first and then mold your decision accordingly.
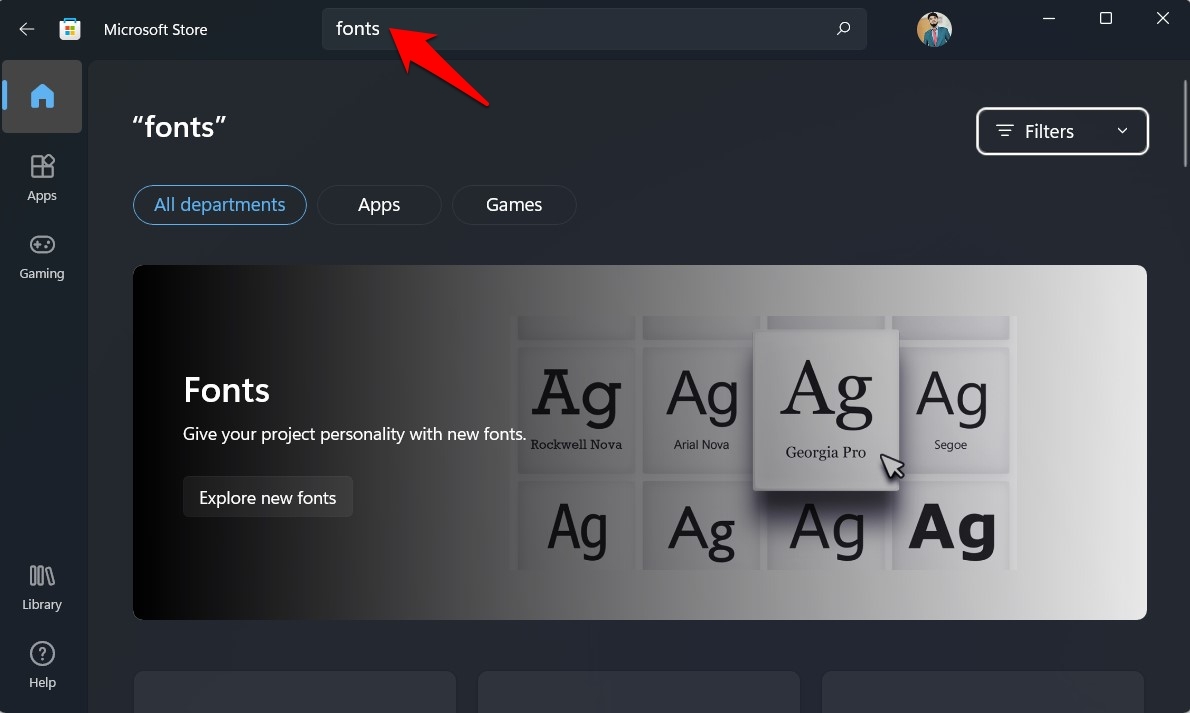
From Microsoft Store
The advantage of trying out fonts from the Microsoft Store are two-fold. First off, you could be sure of the file’s authenticity, and more importantly, you wouldn’t have to be on the lookout in searching for a perfect third-party site offering custom fonts. This is because you will be able to get hold of all your preferred fonts directly under one roof. On the flip side, though, the options are somewhat limited. As opposed to the online sites, the Store only has a restricted number of font styles. So if that’s well and good, then let’s get started. That’s it. This was the first method to install custom fonts in Windows 11. Let’s now make you aware of the next one.
Install Custom Fonts using the TTF File
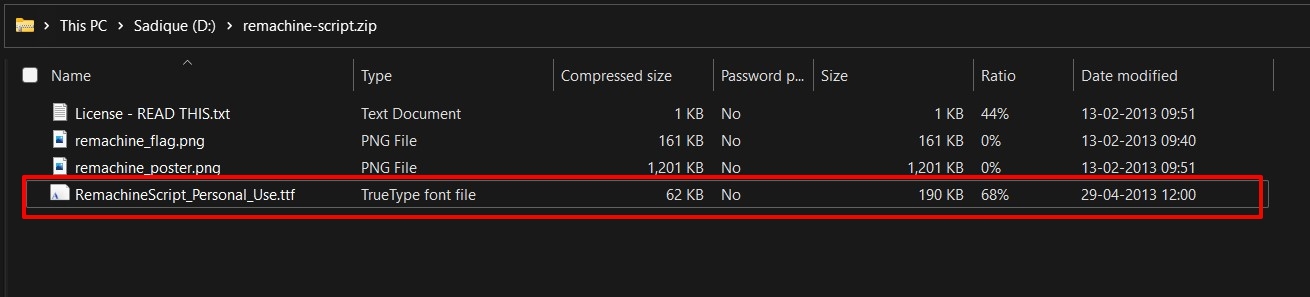
As opposed to Microsoft Store, you will be able to get hold of a plentitude of font styles from the web. However, there could be a few security concerns as well, so make sure that you are downloading the font package from a trusted site. Once downloaded, proceed with the below instructions to install it onto your PC.
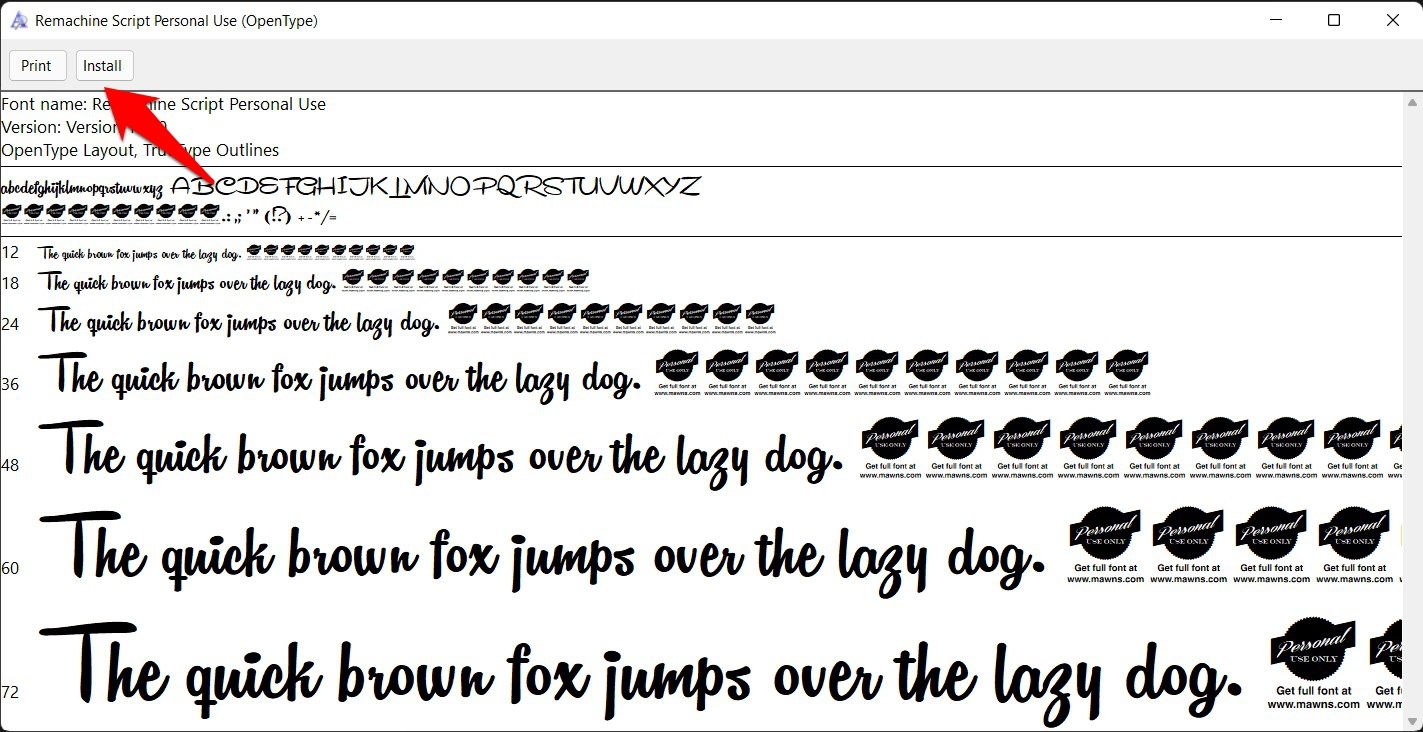
Via Fonts Preview
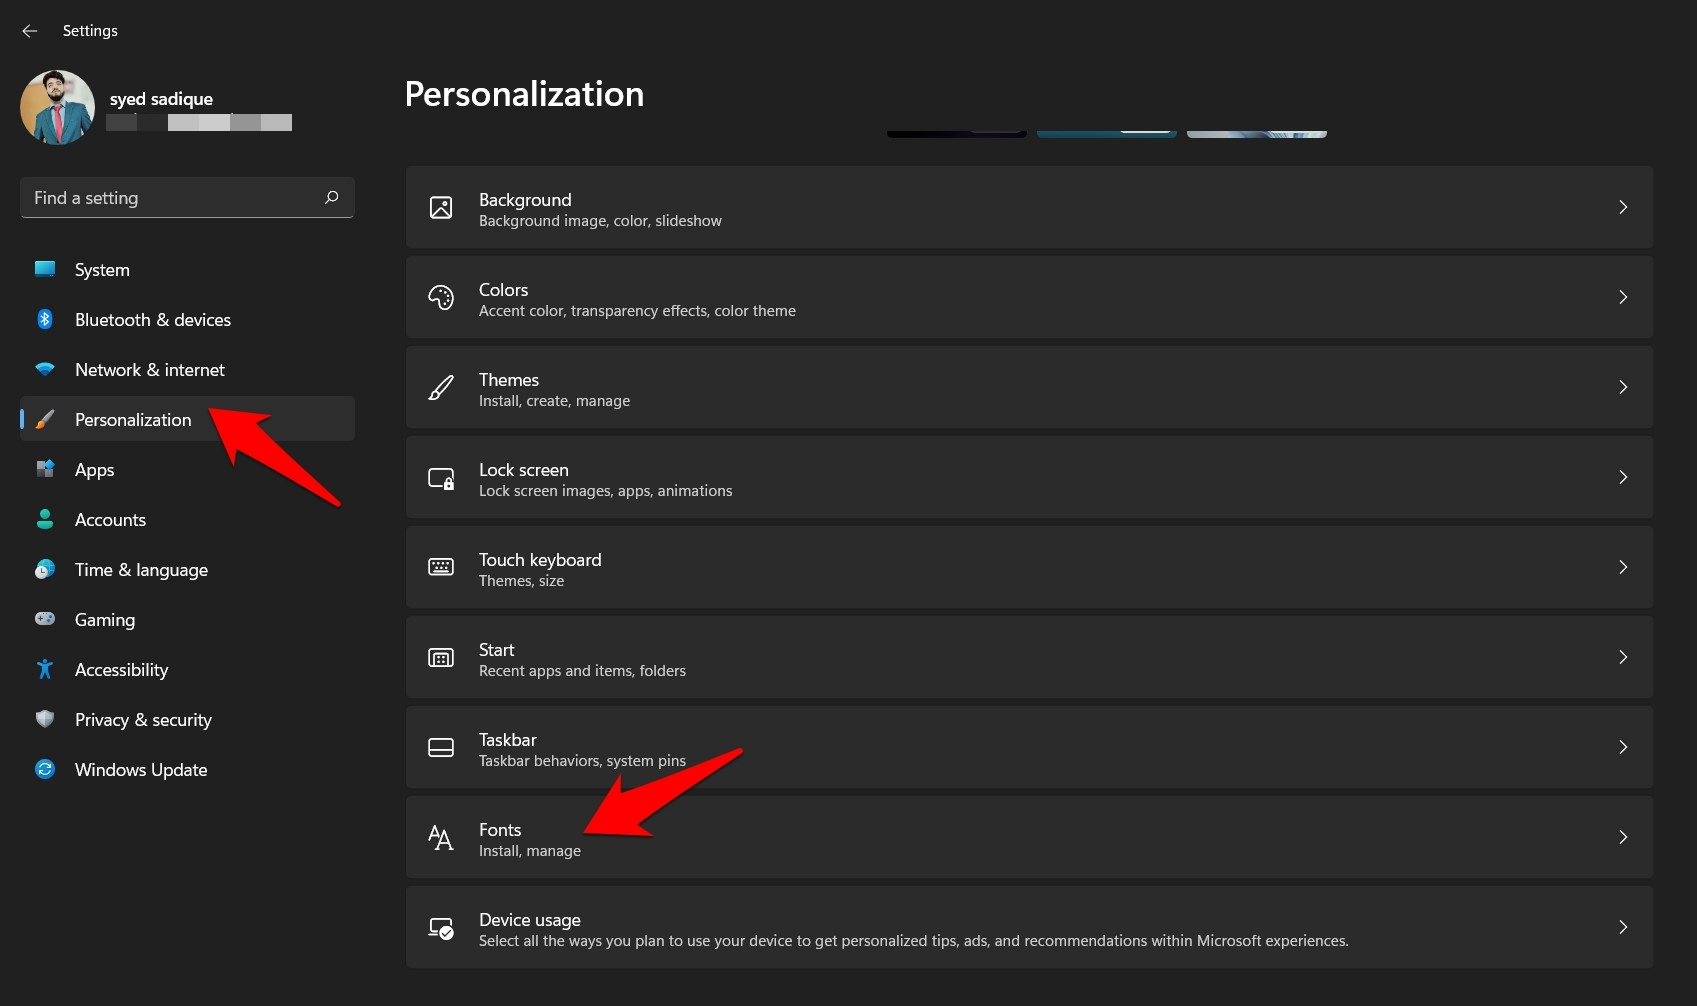
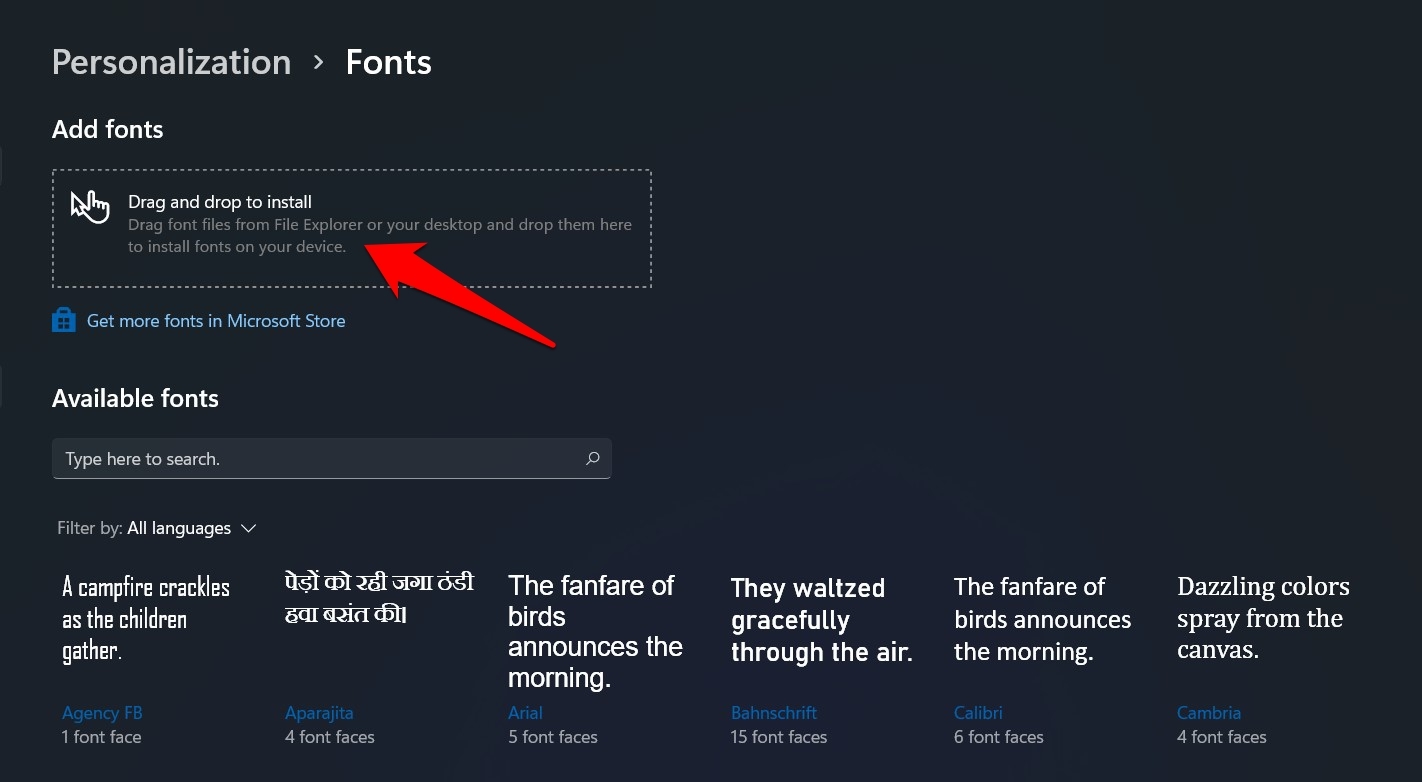
Via Settings Menu
That’s it; These were the two different methods through which you could install custom fonts in Windows 11.
How to Uninstall Custom Fonts in Windows 11?
If you no longer wish to use a particular font style and want to remove it from your PC, then there are two different methods for the same. Let’s check them out:
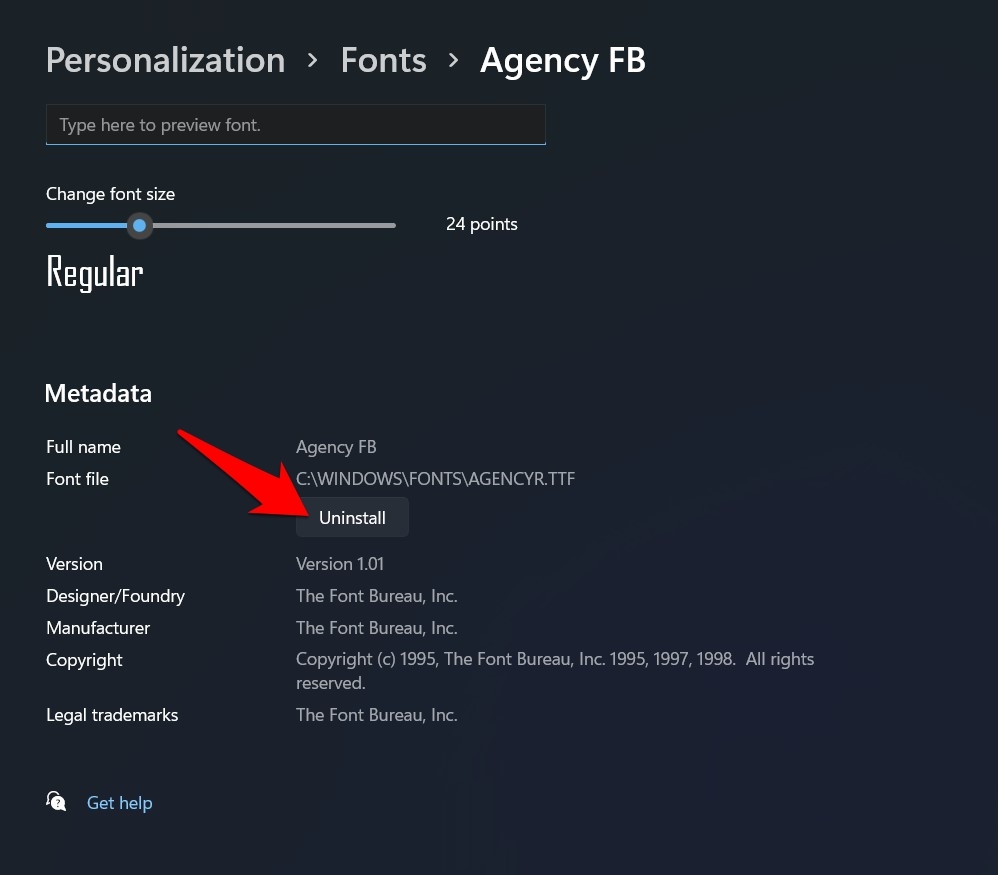
Uninstall Fonts via Settings Menu
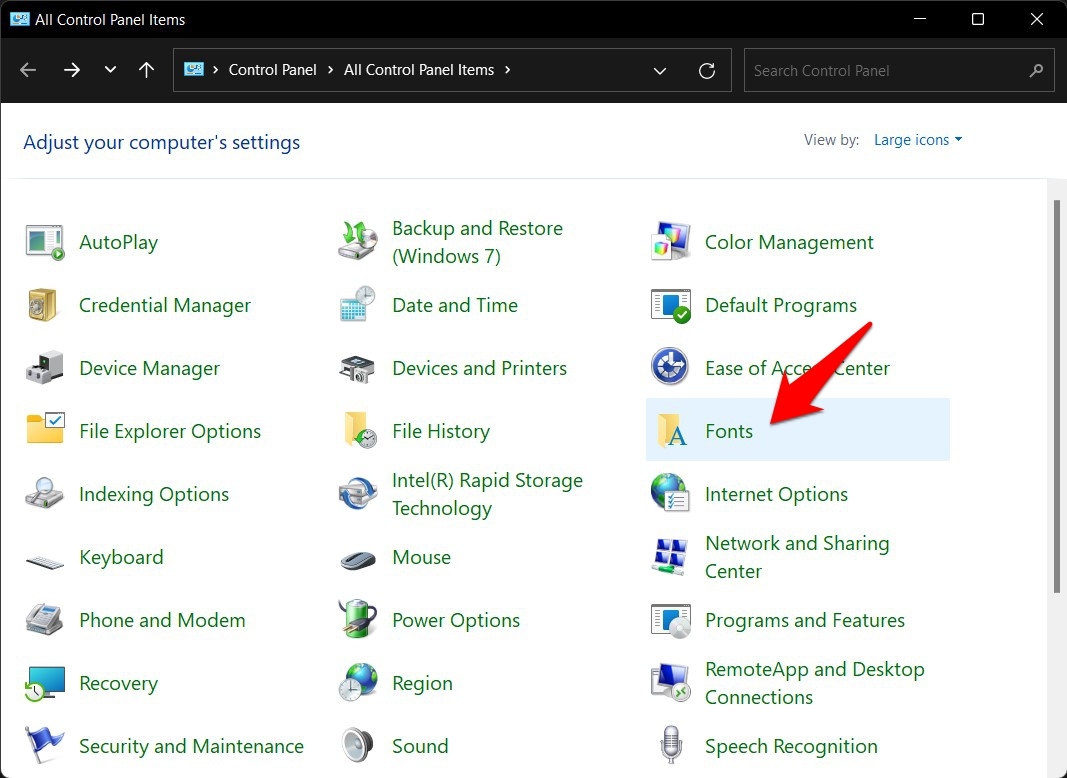
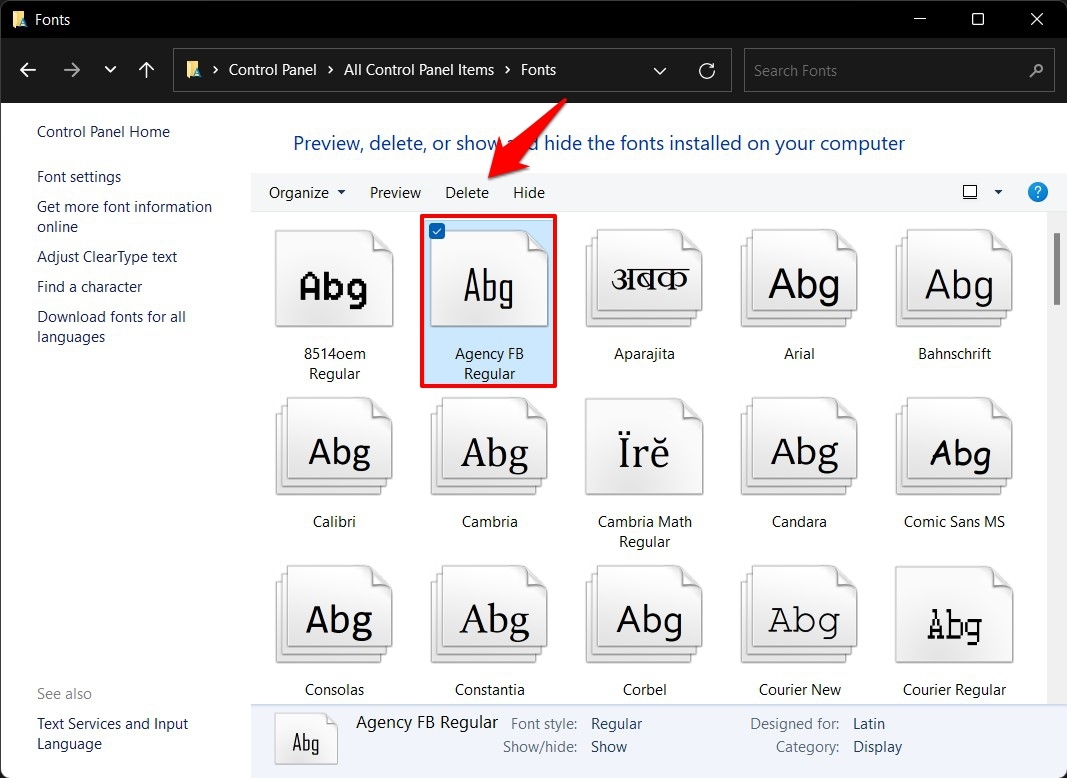
Uninstall Fonts via Control Panel
So with this, we round off the guide on how you could install custom fonts in Windows 11. We have shared two different methods for the same. Likewise, the steps to remove these fonts from your PC have also been listed. If you still have any queries concerning the aforementioned steps, do let us know in the comments section below. If you’ve any thoughts on How to Install Custom Fonts in Windows 11?, then feel free to drop in below comment box. Also, please subscribe to our DigitBin YouTube channel for videos tutorials. Cheers!
How to Fix Windows 11 Not Detecting the Keyboard? [9+ Methods] How to Open Group Policy Editor in Windows 11? 7 Best iPhone Emulators for Windows 11
Comment * Name * Email *